
How to Connect a MIDI Guitar Controller to a DAW or Synthesizer
How to Connect a MIDI Guitar Controller to a DAW or Synthesizer depends on the controller, the available ports, and the equipment that will produce the sound. A musician may want to connect directly to a computer through USB, route MIDI data into a hardware synthesizer through traditional five-pin MIDI cables, use a MIDI interface, or build a compatible wireless setup for live performance.
A MIDI guitar controller does not need to generate sound internally to become a powerful musical tool. It sends performance data to compatible software or hardware. That data can control synthesizers, software instruments, samplers, sound modules, sequencers, and digital audio workstations.
The correct setup begins with a simple question: where should the MIDI data go? Once that is clear, the required cables, adapters, interface settings, and software selections become easier to identify.
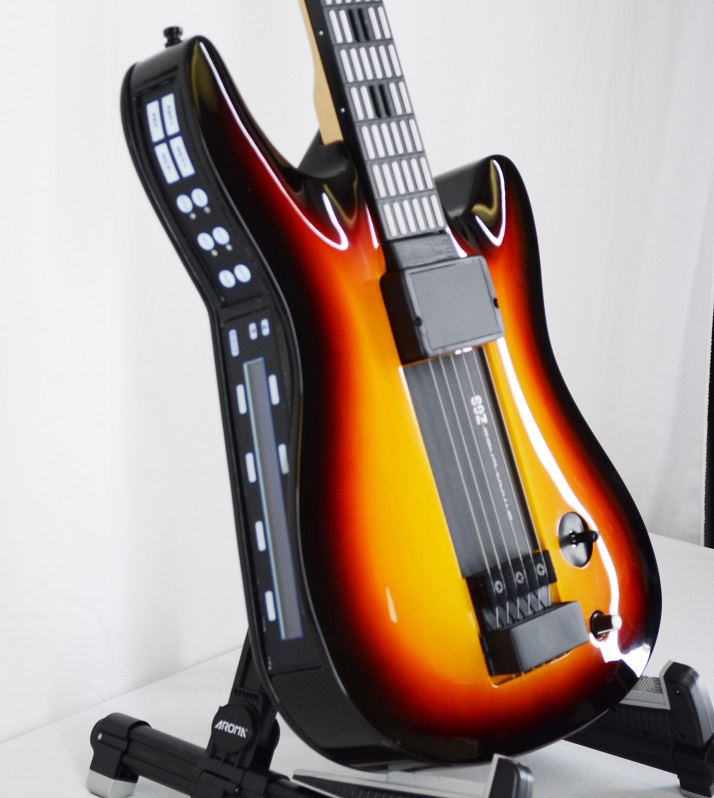
Starr Labs designs guitar-style MIDI controllers for performers, producers, educators, and electronic musicians. This guide explains how to connect a Starr Labs MIDI guitar controller to a DAW or synthesizer while avoiding common setup mistakes.
How to Connect a MIDI Guitar Controller to a DAW or Synthesizer: Start With the Signal Path
Before connecting cables, write down the complete signal path. The MIDI controller sends instructions. The connected software or hardware receives those instructions and produces sound.
Basic MIDI Guitar Controller Signal Path
- MIDI guitar controller: Captures notes, velocity, trigger activity, button presses, pedal movements, and other programmed controls.
- Connection method: Carries the MIDI data through USB MIDI, five-pin MIDI, a MIDI interface, or a compatible wireless MIDI system.
- Receiving device: Receives the MIDI data through a computer, synthesizer, sound module, sampler, tablet, smartphone, or sequencer.
- Sound source: Generates the instrument sound through a software synthesizer, hardware synthesizer, sampler, virtual instrument, or sound module.
- Audio output: Sends the finished sound to headphones, speakers, studio monitors, an amplifier, or a live sound system.
MIDI Data Is Not Audio
MIDI data and audio are different. A MIDI cable carries performance instructions. It does not carry the finished sound in the same way as a standard audio cable.
A player may press a key on the fingerboard, activate a string trigger, move a joystick, or use a pedal. The controller sends MIDI information describing the performance. The receiving instrument or software then creates the audible result.
For a broader comparison of controllers and sound sources, read MIDI Guitar vs. Guitar Synthesizer.
How to Connect a MIDI Guitar Controller to a DAW Through USB
A USB MIDI connection is often the most direct option for musicians working with a computer-based recording setup. A compatible USB connection allows the MIDI guitar controller to communicate with a DAW and control software instruments.
Step 1: Identify the USB Port on the Controller
Review the controller and confirm the required cable type before ordering accessories. Different Starr Labs instruments may use different ports or model-specific connection methods.
The GoTar-3 is designed around a portable USB MIDI workflow. The existing GoTar-3 USB MIDI controller guide explains that the controller can connect to a computer through USB and can also work with compatible mobile-device adapters.
Step 2: Connect the Controller to the Computer
- Power down or close unnecessary software before changing the setup.
- Use the correct USB cable for the controller.
- Connect the MIDI guitar controller to an available USB port on the computer.
- Allow the operating system time to recognize the connected device.
- Open the DAW after the computer recognizes the controller.
Step 3: Select the MIDI Guitar Controller Inside the DAW
Open the DAW settings and locate the MIDI input or MIDI-device section. Enable the connected MIDI guitar controller as an input device. The exact menu name varies by DAW.
Common menu labels may include:
- MIDI Devices
- MIDI Input
- Preferences
- Settings
- Audio and MIDI Setup
- External Devices
- Controller Settings
Step 4: Create a MIDI or Software-Instrument Track
- Create a new MIDI track or software-instrument track.
- Choose the MIDI guitar controller as the track input when required.
- Load a software synthesizer, sampler, or virtual instrument.
- Arm the track for recording or activate input monitoring.
- Play the controller and confirm that the DAW receives MIDI activity.
Step 5: Confirm the Audio Output
If the DAW shows MIDI activity but no sound is audible, check the software instrument and audio output. Confirm that the track contains a loaded sound source and that the DAW is sending audio to the correct headphones, speakers, monitors, or audio interface.
How to Connect a MIDI Guitar Controller to a Hardware Synthesizer
A hardware synthesizer can receive MIDI data directly from a compatible MIDI guitar controller. This type of setup is useful for musicians who want to perform without relying entirely on a computer.
Traditional Five-Pin MIDI Connection
The standard connection path is straightforward:
- Locate the MIDI OUT port on the controller or its required adapter.
- Connect a standard MIDI cable from the controller’s MIDI output path to the MIDI IN port on the hardware synthesizer.
- Power the controller and the synthesizer according to their instructions.
- Select a sound or patch on the synthesizer.
- Play the controller and confirm that the synthesizer receives MIDI data.
Ztar Connections With the PB-1 Phantom-Power Adapter
Some Starr Labs Ztar setups use a PB-1 phantom-power adapter. The official Starr Labs connection documentation shows a standard five-wire MIDI cable running from the PB-1 Controller port to the Ztar MIDI output. This connection can carry phantom power to the Ztar and route MIDI data toward the synthesizer.
A typical compatible path is:
- Connect the AC/DC power supply to the PB-1 phantom-power adapter.
- Connect a standard MIDI cable from the PB-1 Controller port to the Ztar MIDI output.
- Connect another MIDI cable from the PB-1 Synth port to the hardware synthesizer’s MIDI input.
- Power on the equipment.
- Select a synthesizer patch and test the controller.
Because Ztars can include different configurations, confirm the correct connection method for the exact instrument. Review the official Ztar basic-connections diagram, the Ztar connections guide, and the Starr Labs support resources before changing a legacy setup.
How to Connect a MIDI Guitar Controller to a DAW With a MIDI Interface
A MIDI interface can connect traditional five-pin MIDI equipment to a computer. This is useful when the controller or synthesizer does not use a direct USB MIDI connection or when a musician wants to integrate several MIDI devices into one studio setup.
Basic MIDI-Interface Connection
- Connect the MIDI guitar controller’s MIDI OUT path to the MIDI interface’s MIDI IN port.
- Connect the MIDI interface to the computer through USB or the required computer connection.
- Open the DAW.
- Enable the MIDI interface as an input device in the DAW settings.
- Create a MIDI or software-instrument track.
- Load a software instrument and test the controller.
Use the Correct MIDI Direction
MIDI direction matters. The controller sends data from its MIDI output. The receiving device accepts data through its MIDI input.
- Controller MIDI OUT → Interface MIDI IN
- Interface USB connection → Computer
- DAW MIDI track → Software instrument
If the system sends MIDI data back to the controller for system-exclusive operations or other model-specific tasks, a return connection may also be required. Follow the documentation for the exact instrument.
How to Connect a Ztar MIDI Guitar Controller to a DAW or Synthesizer
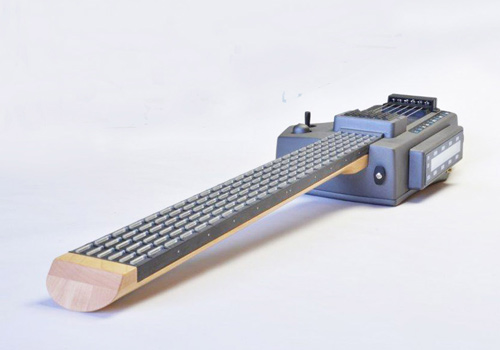
A Ztar MIDI guitar is designed as a programmable digital MIDI controller. It can send MIDI information to compatible synthesizers, drum machines, software instruments, samplers, sequencers, sound modules, and DAWs.
Depending on the model and configuration, a Ztar can include a programmable fingerboard, string triggers, sensors, pedals, buttons, joystick controls, alternate tunings, patches, zones, and MIDI-channel assignments.
Connect a Ztar to a Computer
When using a compatible USB workflow, connect the Ztar to the computer, enable the device in the DAW, create a MIDI track, load a virtual instrument, and test the MIDI input. Review the model-specific manual because older Ztars and customized instruments may use different connection arrangements.
Connect a Ztar to a Hardware Synthesizer
Use the appropriate MIDI output path and connect it to the synthesizer’s MIDI input. Some configurations use the PB-1 phantom-power adapter. Confirm the power method and MIDI path before connecting or disconnecting cables.
Review Ztar Support Documents
For setup information, visit the support page, review the Ztar MIDI guitar controller guide, and consult the model-specific documentation available for the instrument.
How to Connect a GoTar-3 MIDI Guitar Controller to a DAW or Synthesizer
The GoTar-3 is a compact MIDI controller with a 24-fret velocity-sensitive fingerboard. It is designed for portable use and supports tapping and strumming-style performance.
Connect a GoTar-3 to a Computer
- Use the correct USB cable for the GoTar-3.
- Connect the controller to the computer.
- Open the DAW settings.
- Enable the GoTar-3 as a MIDI input device.
- Create a software-instrument or MIDI track.
- Load a compatible virtual instrument.
- Play the controller and confirm that the DAW receives MIDI activity.
Connect a GoTar-3 to a Mobile Device
Older Apple devices can use the appropriate camera-connection adapter and an older Android device can use a USB On-The-Go adapter. Most current devices with a USB-C port will require only a USB-C to A adaptor or hub to connect the GoTar-3 with a USB-A to B cable. Confirm the mobile device, port type, adapter, app, and operating-system requirements before ordering accessories.
Review Wireless Options for a Portable Setup
Some musicians want a wireless connection path for live performance or mobile use. Confirm the exact GoTar-3 configuration and connected device before selecting a wireless accessory.
How to Connect a MIDI Guitar Controller Wirelessly
Wireless MIDI can reduce cable clutter and improve mobility. A wireless system should be matched to the controller, port type, receiving device, performance environment, and required range.
Bluetooth MIDI With CME WIDI Master
The CME WIDI Master BLE-MIDI wireless accessory is designed for compatible five-pin DIN MIDI connections. It can be considered when a musician wants a compact Bluetooth MIDI transmit-and-receive option.
How to Configure MIDI Channels
A connection can be physically correct while the controller and sound source still fail to communicate as expected. MIDI-channel settings should be checked whenever the hardware is connected but no sound is produced.
Match the Transmit and Receive Channels
The controller sends MIDI data on one or more channels. The synthesizer, software instrument, or DAW track must listen for the appropriate channel.
For a simple test:
- Set the receiving device or DAW track to accept MIDI from all channels when that option is available.
- Play the controller and confirm that MIDI activity is detected.
- After the connection works, configure the specific MIDI channels required by the performance setup.
Use Multiple Channels for Advanced Setups
Some Starr Labs controllers can send data across several MIDI channels. This can be useful when different strings, zones, or performance controls need to trigger separate sounds.
For example:
- One zone can control a bass sound.
- Another zone can trigger a lead synthesizer.
- A pad can trigger a percussion sample.
- A pedal can control sustain or volume.
- A joystick can control an assigned expressive function.
Troubleshooting a MIDI Guitar Controller Connection
If the controller is connected but the setup does not behave as expected, isolate one part of the signal path at a time.
If the DAW Does Not Detect the Controller
- Confirm that the correct USB cable or MIDI interface is connected.
- Check whether the operating system recognizes the device.
- Open the DAW MIDI settings and enable the controller or interface.
- Restart the DAW after connecting the device when necessary.
- Test a different USB port or cable when appropriate.
- Review the model-specific documentation.
If the DAW Shows MIDI Activity but No Sound Is Audible
- Confirm that a software instrument is loaded on the MIDI track.
- Check whether input monitoring or record arming is required.
- Confirm that the track volume is audible.
- Check the audio-interface or computer output.
- Confirm that speakers, monitors, or headphones are connected correctly.
If the Hardware Synthesizer Produces No Sound
- Confirm that the controller MIDI output is connected to the synthesizer MIDI input.
- Check the synthesizer volume and selected patch.
- Confirm that the controller and synthesizer use compatible MIDI channels.
- Review the PB-1 connection when using a compatible Ztar setup.
- Test a known-working MIDI cable when possible.
If Notes Trigger Incorrectly
- Check the active patch and tuning.
- Review the MIDI-channel assignments.
- Confirm whether the issue affects one string, one zone, or the full instrument.
- Review sensitivity settings for the specific controller.
- Test one adjustment at a time.
If a Wireless Connection Drops Out
- Confirm the transmitter and receiver configuration.
- Review distance and physical obstacles.
- Check the power or battery status.
- Review nearby wireless equipment.
- Test a cable connection to isolate whether the problem is wireless or controller-related.
How to Connect a MIDI Guitar Controller to a DAW or Synthesizer: Setup Checklist
| Setup Question | Why It Matters |
|---|---|
| What exact MIDI guitar controller is being connected? | Different models may use different ports, power methods, adapters, and setup steps. |
| Will the controller connect to a DAW, hardware synthesizer, or both? | The receiving equipment determines the connection path. |
| Does the setup use USB MIDI or traditional five-pin MIDI? | The required cables and adapters depend on the connection type. |
| Is a MIDI interface required? | A MIDI interface can connect traditional MIDI equipment to a computer. |
| Does the controller require a PB-1 phantom-power adapter? | Some Ztar setups use the PB-1 for power and MIDI routing. |
| Are the MIDI channels configured correctly? | The receiving device must listen for the channels sent by the controller. |
| Is a software instrument or synth patch loaded? | MIDI data does not create sound without a connected sound source. |
| Has the audio output been confirmed? | The setup can receive MIDI correctly while the audio output remains muted or misrouted. |
How to Connect a MIDI Guitar Controller to a DAW or Synthesizer: Frequently Asked Questions
What is the easiest way to connect a MIDI guitar controller to a DAW?
For a compatible controller, a direct USB MIDI connection is often the simplest option. Connect the controller to the computer, enable it in the DAW MIDI settings, create a MIDI or software-instrument track, load a virtual instrument, and test the input.
Can a MIDI guitar controller connect directly to a hardware synthesizer?
Yes. A compatible controller can send MIDI data to a hardware synthesizer through the correct MIDI output and MIDI input path. Some Ztar setups use a PB-1 phantom-power adapter between the controller and synthesizer.
Does a MIDI guitar controller create sound?
A MIDI guitar controller sends performance information. A compatible synthesizer, sound module, sampler, software instrument, or DAW setup produces the audible sound.
Do I need a MIDI interface?
A MIDI interface may be required when a traditional five-pin MIDI controller needs to connect to a computer that does not provide the required MIDI input. A direct USB MIDI connection may not require a separate MIDI interface.
What is the PB-1 phantom-power adapter?
The PB-1 is used in some Starr Labs Ztar connection paths to supply power and route MIDI data between the instrument and connected equipment. Review the documentation for the exact Ztar before changing the setup.
Can I connect a GoTar-3 to a DAW?
Yes. The GoTar-3 is designed for USB MIDI use with compatible computers and software. Enable the controller in the DAW settings and load a software instrument on a MIDI track.
Can a MIDI guitar controller connect to a mobile device?
Some compatible setups can use tablets or smartphones. Confirm the controller, mobile-device port, operating system, adapter, app, and connection requirements before ordering accessories.
Can I use wireless MIDI instead of a cable?
Wireless MIDI options are available for compatible setups. Match the wireless accessory to the controller ports, receiving equipment, required range, and performance environment.
Why does the DAW detect MIDI but produce no sound?
The track may not have a loaded software instrument, input monitoring may be disabled, the wrong track may be selected, or the audio output may be misrouted. Confirm both the MIDI input and the audio-output path.
Where can I get setup help?
Visit the Starr Labs support page, review the MIDI controller questions page, or use the contact page to describe the controller and intended setup.
Ask Starr Labs How to Connect a MIDI Guitar Controller to a DAW or Synthesizer
How to Connect a MIDI Guitar Controller to a DAW or Synthesizer becomes easier when the signal path is planned before the cables are connected. Identify the controller, connection type, receiving equipment, sound source, MIDI channels, and audio-output system. Then test one part of the setup at a time.
Call Starr Labs at 858-285-0831 for help reviewing controller compatibility, setup questions, and available connection options. You can also send a message through the Starr Labs contact page, visit the support resources, browse the Starr Labs MIDI controllers, or sign up for product news, setup tips, specials, and upgrade information.